Summary: With the Curves Adjustment you will begin learning how to manually adjust your images. In the previous tutorial we showed you how you can use the auto enhance features in Photoshop which does a good job. Once you learn how to use the Curves adjustment, you will see excellent results in enhancing your images. Throughout this course you will learn how to read the curve chart or even how to sample colors using the Eye Droppers. Finally, throughout this tutorial we will be giving you some tips and tricks about Curves!
Currently we are using Windows Vista Home Premium 64 Bit and the Photoshop CS4 Extended 64 Bit version.
Knowledge You Need to Know:
If you are unfamiliar with certain areas that are not covered in this tutorial, feel free check out other tutorials on our website. We have many different types of tutorials that can be downloaded (Video, PDF) or viewed online that will train you for free! Once you have the knowledge, feel free to come back and go through this tutorial again.
Preparing For This Tutorial:
You will be using the ducks image which we have used in the past tutorial. If you do not have this image, please scroll down to the “Click Picture To Download Supporting Files” and download the image. Please open the image PE-DUCKS in the Photoshop Program.
Understanding Curves:
Before we begin, we wanted to talk about what the Curves adjustment will do for you. This nifty tool will enhance you picture. By default you can adjust an image highlights, midtones, and shadows. Or simplistic terms, it can adjust Light areas, Dark Areas and items in between.
Have you ever taken a picture and the colors appear to be washed out or certain areas it is too dark? Well than you will love the Curves adjustment. Besides adjusting all the different colors, the Curves adjustment allows you to change and enhance all colors or only the Reds, Greens and Blues (RGB). For this tutorial we will be working with all the colors at once (RGB) because the steps are exactly the same to fix all 3 primary colors versus the individual primary color. There are different ways to use the Curves and we will show you each way beginning with the easiest method.
Using Curves:
To use the Curves option, Left click the “Image” menu and move your mouse cursor down to the “Adjustments” and a sub-menu will be displayed. Left click the “Curves…” command. Photoshop Tip – The keyboard shortcut is CTRL-“M”.

You will than see a dialog box. Let’s go over some basics. The top section is you’re Light area and it is the Highlights of the image. The bottom section is your Dark area or you’re Shadows. The middle area is you’re Midtones. By default Photoshop will create a diagonal line from the bottom left hand corner to the top right hander corner. Bottom left is the darkest portion of the graph and the top right is lightest portion of the graph.

Let’s go over some the basic options.
| | A). Left click to see a list of presets you can use. This is explained later in the course. |
| | B). Channel is the Red, Green, Blue. If you select RGB you will change all the colors at once. For this tutorial, please leave it as “RGB”. |
| | C). On this example, Left click the “Auto” button. |
| | D). Make sure the “Preview” option is checked so you can see the changes. |
| | E). Press “OK” if you are happy with the changes or “Cancel” if you want to disregard the changes. |

Because you clicked the “Auto” button, your image should look like this. Wow, a huge difference already.

Eyedropper and Curves:
We are using the “Auto” enhanced image to enhance it even further with the Eye droppers. For all of these eye droppers you will Left click the eye dropper and then Left click that portion of the image. For our example we used the tail of the front duck for the black and the head of the back duck for the gray and the white area of the front ducks tail.
| | A). Left click this eye dropper and then Left click the darkest area of the image. |
| | B). Left click this eye dropper and then Left click a gray area of the image. |
| | C). Left click this eye dropper and then Left click a white area of the image. |

On our example we clicked on the back of the front duck to get the black area and for the white area, we clicked on the white tail area of the front duck. Finally for the middle eye dropper we clicked the gray part in the head of the back duck. After clicking the “OK” button, here is our end result.

Using A Preset And Manual Curves:
Let’s get back into the Curves Adjustment and you will notice that every single time you press “OK” it will change the image and that it will always have the diagonal line only. Left click on the Preset drop down menu and Left click the “Medium Contrast (RGB)”.

If you look at the chart (also the image will change if you have “Preview” turned on) you will notice it added points to the chart. It is important to understand what these points mean. You always have at least 2 points in the chart.
| | A). By default it will add a point in the shadows area (refer to page 4 for more details) which will give you the darkest area of the chart. |
| | B). By default it will add a point in the highlights area (refer to page 4 for more information) which will give you the lightest area of the chart. |
| | C). This is the base line. |
| | D). The additional points are adjustments that it made. |

Understanding Points:
Move your mouse to the center point towards the bottom (the one that we show (D) on from the previous page. Now hold down the Left mouse button and drag that point. You will notice when you drag the point down it will make the image darker and up lighter. See the gray bar on the left hand side of the chart? Notice how it is darker on the bottom? That is why it is getting darker when you move it down.
Maybe you want to change the scale. So the darker is a bit lighter and the lighter is a bit darker. To change the scale, please read the following explanations below.
| | A). Move your mouse pointer to the dark up arrow (left hand side). Now hold down the Left mouse button and drag it to the right. Release the Left mouse button when you are complete. |
| | B). Move your mouse pointer to the light up arrow (right hand side). Now hold down the Left mouse button and drag it to the left. Release the mouse button when you are happy with the changes. |

Adding Points:
The easiest way to add a point is to Left click on the line! Remember if you add a point to the top of the line of the chart you will be affecting Highlights and the bottom the Shadows. Maybe there is a specific area of the image you want to enhance. On this example, let’s find an area to enhance the midtones!
On the bottom left hand side of the Curves Adjustment dialog box, Left click the Finger (has an up and down arrow). Now move your mouse cursor to the image and towards the gray part of the back ducks head.

You will notice as you move your mouse over the image an empty circle will move in the Curves Adjustment dialog box. Left click the image area you want and you will notice it will add a point to the chart. Your point may be in a different location than ours, but it should be towards the middle of the chart.

We dragged that new point down and to the right to enhance the image even further. Left click the “OK” button to apply the changes. Photoshop Tip – To delete a point (you must have at least 2 points), Left click the point and press the “Delete” key on the keyboard. You can also drag that point off the chart to delete the point.

Before And After:
The after image below does not look perfect, but looks a lot better than the original. In the next few sections of this tutorial, we will show you how you can enhance it even further. You will notice the “After” image looks no longer washed out. In our eyes it is an extreme improvement, but not perfect.

Fine Tuning:
The next few sections, we will be discussing how to fine tune this image. Go ahead and bring up the Curves Adjustment dialog box again. Notice how there is 16 gray boxes on the chart? Sometimes it is much easier to fine tune smaller areas. To add smaller gray boxes (this helps you focus on a specific area), hold down the ALT key on the keyboard and Left click on the chart anywhere. Release the ALT key. Now you will see a lot more gray boxes on the chart.

Even though it is the same steps on how you add/change the curves, try enhancing one primary color at a time. Do this by Left clicking the Channel drop down and selecting a color. Instead of changing the curve for all the colors you can change a specific color. You will find if you individually enhance the Red, Green, or Blue your image will look better.

Fixing A Portion Of The Image:
We discussed this tip in the “Auto’s” tutorial, but if you want to adjust only a portion of the image, we recommend that you make a selection of the area that you want to fix (you can even copy it to a new layer). On the example below we made a ROUGH selection of the ducks and made the adjustment. This left the grass still washed out.

The NO’S:
If you are looking to enhance an image, than there are some types of curves that you DO NOT want to try or at least try to stay away from.
| | A). Try not to make a steep line (up or down) in between the points. This causes extreme contrast to be added. |
| | B). Try not to make a flat line also between the points. This causes a loss in contrast. |
| | C). Do not make your chart look like a roller coaster. It should not be constantly going up and down. |
Additional Tips:
Besides the opposite of the NO’s, there are a few tips that we would like to go over.
| | A). Adding more points to the chart will allow you to fine tune your image even more. |
| | B). Compare! Look at the current image and make your changes. Does it look better? If no, undo your changes. |
| | C). Experiment with curves. Each image will be different and there is not one curve that is right for every picture. |
| | D). Try making an “S” curve. What is an “S” curve? It looks like an “S” on the chart. |
| | E). Adjust each individual color (Red, Green, Blue) separately to get better results. |
Conclusion:
You will notice there are a few options or areas we did not cover, but what you just learned is more than enough for now. When we get into “Levels”, we will be explaining what a Histogram is (that is the gray chart lines in the curves chart).
By now you should know how to adjust all of the colors or just a specific primary color of an image. You have also learned how to use the eye droppers to select your highlights, midtones, and shadows. We also showed you how the “Auto” button does a good job to enhance it very quickly. By now you should know how to read and add/remove points from the chart. We also explained what types of curves you should stay away from! Finally we showed you the presets do a very good job at enhancing an image.
End result, your image should look much better now.

1). How do you remove a point from the Curves chart?
| | A). Hold down the Left mouse button and drag it to the “Delete” button on the right hand side. |
| | B). Hold down the Left mouse button and drag it off of the chart. |
| | C). Left click the “Reset” button. |
| | D). You only can press “Cancel” and then add the points again. |
2). What area of the chart is for the Highlights?
| | A). Middle. |
| | B). Top. |
| | C). Bottom. |
| | D). Bottom Left. |
3). The Channel is for what in the Curves Adjustment dialog box?
| | A). It allows you to switch channels which are layers. |
| | B). You can change the Channel to change the shades of the contrast displayed. |
| | C). Unless you are working on a black and white photo, you can’t change the Channel. |
| | D). Use the Channel option to use the curves on either the Red, Green, Blue or RGB colors. |
4). What sub-menu is the Curves located in?
| | A). Image. |
| | B). Curves. |
| | C). Adjustments. |
| | D). Curve Adjustments. |
5). What is the keyboard shortcut to get to the Curves dialog box?
| | A). ALT-“C”. |
| | B). CTRL-ALT-“C”. |
| | C). ALT-“A”. |
| | D). CTRL-“M”. |
6). In the Curves Adjustment dialog box, what is one way to quickly enhance your photo?
| | A). Left click the “Auto” button. |
| | B). Right click the chart and Left click “Auto Enhancements” command. |
| | C). Move the dark left up arrow on the bottom to the far right. |
| | D). There is no quick way to enhance the photo in Curves. |
7). What does the far left Eye Dropper do in the Curves adjustment dialog box?
| | A). It allows you to select a gray area in your photo to sample. |
| | B). It allows you to select a light area in your photo to sample. |
| | C). It allows you to select a midtone area in your photo to sample. |
| | D). It allows you to select a black area in your photo to sample. |
8). The bottom area of the chart is called what?
| | A). Highlights. |
| | B). Midtones. |
| | C). Shadows. |
| | D). RGB. |
9). What is the least amount of points you can have in the Curves Adjustment dialog box?
| | A) 1. |
| | B). 2. |
| | C). 3. |
| | D). 4. |
10). Name one of the NO’s we recommended that you stay away from if you are trying to enhance an image?
| | A). DO NOT adjust each individual color or else it will cause problems (stick with RGB only). |
| | B). DO NOT create a chart that looks like a roller coaster. |
| | C). DO NOT add to many points or it will cause problems with adjustments. |
| | D). DO NOT experiment with curves because truly there are only 1-2 types of curves that improve your image (example: “S” curve). |
Answers: 1). B, 2). B, 3). D, 4). C, 5). D, 6). A, 7). D, 8). C, 9). B, 10). B
Scoring:
0 - 5 = Please review the video tutorial and re-read this document either offline (PDF) or online.
6 – 8 = We would recommend that you print this document off and read it at a later time.
9 – 10 = Congratulations you have passed the quiz. Go ahead and view another tutorial on our site.
We hope you enjoyed this detailed tutorial. Please visit us at: http://www.Photoshopeducation.blogspot.com to expand your knowledge within Adobe Photoshop.

Click Picture To Download Video File To View Offline
Download Total Video Player, iTinySoft
 Click Picture To Download PDF Tutorial
Download Adobe Reader, Adobe Corporation 
Click Picture To Download Supporting Files
(Brushes, Textures, Fonts, Images, Actions, .PSD, Etc.)
Download ZipGenius Standard Edition 6.0.3.1150, Dicono di ZipGenius
Digital painting process machine gun concept, Step by step from rough sketch to finished render.
Hi guys, it's been a week since I update some art work or any sketch. I've been busy with the holiday stuff and cooking some code in my little project called "
Zodiac Blades." Here are some update for the art on the project. If any of you remembered, the guy had a glove, a flaming hand, then now I decided that it would be a lot easier with the heavy weapon like machine gun. I thought it would be easier for me with the personal project I am going with. The cool thing is, with machine gun, he can easily switch weapon to flame thrower, shotgun, and many heavy different looking kind of weapon. And it will be good for me as an artist to sketch and paint more of a gritty sci-fi genre.
I'm still thinking about doing some more free tutorial as soon as I get some time in my hand, recently I did a bunch of typical superheroes video tutorial sketch and shading basically on how to draw comics so there are
How to draw Marvel Susan Storm from Fantastic 4,
How to draw comics superhero spiderman,
How to draw Batgirl,
How to draw Emma Frost X-men,
How to draw supergirl,
How to draw Jean Grey X-men and my
How to draw comics character Hulk, it also has coloring or paint over tutorial. Also the new arrival video tutorial,
How to draw Captain America. And an older video tut,
How to draw Batman or Darknight. More on comics characters drawing, I have a few female or girl characters line up so...
Also there are some of the video that might help you refine your art skill foundation I would recommended like how to render basic unique style facial character from start to finish
Character Design Face Male Merchant Character,
Character design sketch villain or
Drawing Male Face Swordman and
Learn how to draw and paint face. And with male anatomy study:
Drawing body muscle torso anatomy and
Drawing arm muscles bicep tricep these are quite short, but could be valuable for you if you are interested in learning drawing body and such.
If you are looking for
Hopefully there will be more art coming from idrawgirls' kitchen. Now I am really busy learning some code for iphone SDK and Java. It's fun but it's kinda hard for me since I've never done any real coding other than html, xml and java script. Have fun guys, will update more soon. :)
Anyway, here is an image of our hero with the weapon of his choice for now.
Dude with machine gun concept art (still in the work)
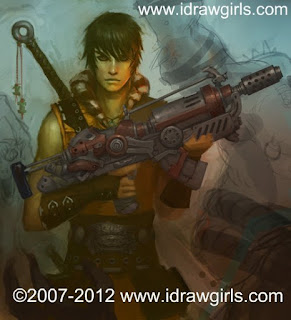
Here are step by step how I sketch and paint machine gun concept art.


Hi everyone! This month I have a bunch of various physics video lectures.They include videos on Escher and Droste effect, Sir Roger Penrose and new physics, Feynman, Nikola Tesla, gyroscopes, black holes, dark matter, dark energy, modern cosmology, origins of universe, theoretical physics, particle hydrodynamics, numeric relativity, plasma, astrophysics, superstring theory, LHC, gravity, OLED
As most of you are aware after each course you will find a 10 question quiz. These quizzes were created to help you identify how much knowledge you have learned for that specific subject in the Photoshop program. From time to time we will be adding pop quizzes to our website. These quizzes are based off of previous tutorials.
These questions are bit tougher to make sure you really do understand each course. Don’t worry, all the answers can be found in one of the tutorials. Please note, just like a true pop quiz, we may be putting in some trick questions. For each pop quiz we will be asking you a total of 20 questions. We hope you enjoy these bonus quizzes!

Pop Quiz 3: Course 21-30
1). What is one quick way of using a slider bar such as the strength slider bar?
| | A). Left click the right arrow for the slider bar and use “[“ or “]” to decrease or increase. |
| | B). Left click the right arrow for the slider bar and use the left or right arrow to decrease or increase. |
| | C). Right click and select “Auto” and then you can use the “[“ or “]” to decrease or increase. |
| | D). Hover over the slider and use your center scroll mouse button. |
2). When sharpening an object with the Sharpen Tool it is better to do what?
| | A). Start with a low strength and always make multiple passes. |
| | B). Start with a high strength and make 1 pass and then use a layer mask to remove the incorrect enhanced areas. |
| | C). Start with a low strength, with a few passes or even better try to get the strength right with 1 pass. |
| | D). Set the hardness level very high on your brush, so even if the strength is turned up it will look good. |
3). When creating a custom Gradient, there are 2 types of stoppers (top and bottom), what is the top stopper called?
| | A). Strength Stopper. |
| | B). Gradient Stopper. |
| | C). Color Stopper. |
| | D). Opacity Stopper. |
4). What is the keyboard shortcut to use the last Gradient/Paint Bucket Tools?
| | A). “P”. |
| | B). “G”. |
| | C). “B”. |
| | D). “T”. |
5). What is an easy way to display the Gradient name?
| | A). Hover over the preset image and the Gradient name will be displayed. |
| | B). Right click over the preset image and Left click “Gradient Name” to display the name. |
| | C). Hold down the Left mouse button and drag the preset to the “Name” button. |
| | D). Left click the preset image and Left click the “Name” button. |
6). How many different types of Gradients can be stored in a .GRD file?
| | A). Only 1. |
| | B). 1 to 50. |
| | C). 1 to 100. |
| | D). As many as you would like. |
7). What does the Sponge Tool do?
| | A). It creates a water color effect. |
| | B). It Saturates or Desaturates colors. |
| | C). It only Desaturates colors. |
| | D). It only Saturates colors. |
8). What is the keyboard shortcut to use the Dodge, Burn, or Sponge Tools?
| | A). “S”. |
| | B). “D”. |
| | C). “O”. |
| | D). “B”. |
9). What happens when you hold down the ALT key and Left click a spot on the image while using the Spot Healing Brush?
| | A). It color samples the area. |
| | B). It samples the contrast of the area. |
| | C). It color and contrast samples of the area. |
| | D). It will give you a warning because, you can’t sample with the Spot Healing brush. |
10). What does the Source radio box do when using the Patch tool?
| | A). This tells Photoshop to sample only the colors in this area. |
| | B). This tells Photoshop that you want to select the good area first. |
| | C). This tells Photoshop that you want to select the bad area first. |
| | D). This tells Photoshop to ignore any modifications that you have made and use the source image to sample. |
11). What is the keyboard shortcut to use the last active Pattern Stamp/Clone Stamp Tool?
| | A). “C”. |
| | B). “S”. |
| | C). “T”. |
| | D). “P”. |
12). The “Impressionist” option in the Pattern Stamp Tool does what?
| | A). It allows you to use more brush settings. |
| | B). It creates a hard edge when painting. |
| | C). It allows you to change the brush tip setting only. |
| | D). It creates a pattern effect that is an artistic effect (blurs edges). |
13). What is the keyboard shortcut to get into the preferences dialog box?
| | A). CTRL-“K”. |
| | B). CTRL-“P”. |
| | C). CTRL-“O”. |
| | D). CTRL-“T”. |
14). What does the far right option (image) on the bottom of the History Palette do?
| | A). It takes a snapshot of the current history. |
| | B). It creates a new document based off of that snapshot. |
| | C). It deletes the current history step. |
| | D). It allows you to rename the snapshot. |
15). Before using the Art History Brush, what is one step that you must do first?
| | A). Reset your history palette. |
| | B). Rearrange your history palette in the correct order. |
| | C). Take a snapshot of the history state. |
| | D). Create a duplicate layer and set the opacity to 50%. |
16). How do you get more detail from the Art History Brush?
| | A). In the options bar, Left click the down arrow for “Strength” and select “Sharp”. |
| | B). Use a smaller brush size. |
| | C). Right click the image and Left click the “Sharpen” option. |
| | D). When you are done using the Art History Brush, create a Layer mask and then begin sharpening the image. |
17). What key do you hold down to make a perfect square when using the Crop tool?
| | A). “Shift”. |
| | B). CTRL. |
| | C). ALT. |
| | D). Fn. |
18). What does the slice tool do?
| | A). It is one of Photoshop’s filters that takes an image and creates an effect of your image being sliced into pizza slices. |
| | B). It compresses the whole image down in size. |
| | C). Used to slice a picture up into smaller pictures and used for an image on a website. |
| | D). It creates an effect that makes it appear to be sliced open like a metal can. |
19). The 3 Auto Enhancements are located in what menu?
| | A). Edit. |
| | B). Image. |
| | C). File. |
| | D). Enhance. |
How do you use the Auto Enhance features only on certain areas of the image?
| | A). Use the drawing tools and create a line in the area that is needed to be fixed. |
| | B). Use the “Auto Select” option and Left click the area and it will only fix that area. |
| | C). Make a selection of the area you want to fix and then use the auto enhancement features. |
| | D). Create a layer mask and apply the auto enhancement feature in that area only. |
Answer Summary: 1). B, 2). C, 3). D, 4). B, 5). A, 6). D, 7). B, 8). C, 9). D, 10). C, 11). B, 12). D, 13). A, 14). C, 15). C, 16). B, 17). A, 18). C, 19). B, 20). C
Answer Information:
1). What is one quick way of using a slider bar such as the strength slider bar? – Refer to the Smudge, Sharpen, Blur Tools and page 3.
2). When sharpening an object with the Sharpen Tool it is better to do what? – You will find the answer in the Smudge, Sharpen, Blur Tools tutorial on page 10.
3). When creating a custom Gradient, there are 2 types of stoppers (top and bottom), what is the top stopper called? – Refer to the tutorial called: Gradient And Paint Bucket Tools and page 14.
4). What is the keyboard shortcut to use the last Gradient/Paint Bucket Tools? - The answer can be located on page 8 of the Gradient And Paint Bucket Tools tutorial.
5). What is an easy way to display the Gradient name? – The Gradient information is located in the More Gradients Please tutorial on page 5.
6). How many different types of Gradients can be stored in a .GRD file? – Refer to the tutorial More Gradients Please tutorial on page 8.
7). What does the Sponge Tool do? – You can locate the answer on page 8 of the Dodge, Burn, And Sponge Tools course.
8). What is the keyboard shortcut to use the Dodge, Burn, or Sponge Tools? – The answer is on page 3 of the Dodge, Burn, And Sponge Tools tutorial.
9). What happens when you hold down the ALT key and Left click a spot on the image while using the Spot Healing Brush? – The Spot Healing Brush tutorial information is located in the Heal Problems with the Patch Tool tutorial on page 12.
10). What does the Source radio box do when using the Patch tool? – Refer to the tutorial Heal Problems with the Patch Tool tutorial on page 10.
11). What is the keyboard shortcut to use the last active Pattern Stamp/Clone Stamp Tool? – You can locate the answer on page 6 of the Cloning the Red Eye tutorial.
12). The “Impressionist” option in the Pattern Stamp Tool does what? – The Impressionist information is located in the Cloning the Red Eye course on page 7.
13). What is the keyboard shortcut to get into the preferences dialog box? – Locate the answer to the question on page 5 of the All About The History Palette tutorial.
14). What does the far right option on the bottom of the History Palette do? – Refer to the All About The History Palette tutorial on page 8.
15). Before using the Art History Brush, what is one step that you must do first? – In the Add Art To Your History Brush tutorial on page 2, you will find your answer.
16). How do you get more detail from the Art History Brush? – Check out the Add Art To Your History Brush tutorial on page 13 for more information.
17). What key do you hold down to make a perfect square when using the crop tool? – On page 3 of the Slice The Crop Tool tutorial, you will find your answer.
18). What does the slice tool do? – Refer to the Slice The Crop Tool course on page 8.
19). The 3 Auto Enhancements are located in what menu? – In the The Autos course, you will find the answer to the menu location. This is located on page 2 of the tutorial.
20). How do you use the Auto Enhance features only on certain areas of the image? – The answer to the question is located in the The Autos tutorial and on page 8.
Scoring:
0 - 14 = Please review the video tutorial for that section and re-read the course document either offline (PDF) or online.
15 – 17 = We would recommend that you print that sections document and re-read it offline.
18– 20 = Congratulations you have passed the pop quiz. Go ahead and start with course 11 to learn even more tools and tips.
We hope you hope you enjoyed this pop quiz. Please visit us at: http://www.Photoshopeducation.blogspot.com to expand your knowledge within Adobe Photoshop.
Click Picture To Download PDF Tutorial
Download Adobe Reader, Adobe Corporation
Summary: Before we get into the manual corrections, we need to show you the different auto correction features in Photoshop. Auto Tone, Auto Contrast, and Auto Color are the areas we will be discussing in this tutorial. You will find most of the time, these 3 tools will improve your image, but most of the time if you manually adjust the settings you will get better results. If you are looking for a quick fix, these tools will do a good job (not a great job) at correcting lighting and enhancing colors. Along the way, we will show you how to even enhance a portion of the Photo!
Currently we are using Windows Vista Home Premium 64 Bit and the Photoshop CS4 Extended 64 Bit version.
Knowledge You Need to Know:
If you are unfamiliar with certain areas that are not covered in this tutorial, feel free check out other tutorials on our website. We have many different types of tutorials that can be downloaded (Video, PDF) or viewed online that will train you for free! Once you have the knowledge, feel free to come back and go through this tutorial again.
Preparing For This Tutorial:
You will be using an image of 2 ducks (PE-DUCKS). If you do not have this image, please scroll down to the “Click Picture To Download Supporting Files” and download the image. Please open the image PE-DUCKS in the Photoshop Program.
Auto Tone:
The first option that we will be discussing is the Auto Tone. You will notice that it will fix very well underexposed images. Left click the “Image” menu and then Left click the “Auto Tone” command.

Here are the “Before” and “After” images. You will notice it darkened up certain areas and made the grass less washed out. It did a good job, but not a great job on enhancing the photo.

Auto Contrast:
We used the History Palette and went back to the open image to apply this Auto Contrast. The Auto Contrast will usually make subtle changes to the Contrast. Left click the “Image” menu and Left click the “Auto Contrast” menu.

Here are the “Before” and “After” examples. Look at the “After” arrows that we have added. Notice how the grass is a bit darker and the head of the duck is a bit darker. You will notice that it used subtle changes to enhance this image.

Auto Color:
We reverted back to the original image before we applied the Auto Color. The Auto Color does a good job at enhancing the colors of the image. Left click the “Image” menu and Left click the “Auto Color” menu.

Here is the side by side comparison. Noticed how it browned up the one duck (back duck). Also notice how it added colors to the front of the duck (see arrows).

Adjust Partial Image:
Sometimes only a portion of the image needs adjusting. You will find if you use the auto enhance features in Photoshop CS4 that sometimes it fixes certain areas, but it causes problems in other areas. The solution is to select the area that you want to fix and then apply the auto enhance commands. On this example, we did a ROUGH selection of the 2 ducks.

So here is the before and after images and you will notice the grass color does not change because it was not selected. Notice the changes in the brown duck. See how it looks better?

Final Image
Here is the before and after images for all of the auto enhancements. For a quick enhancement, it did a good job (when we show you how to manually adjust the images, it will look even better).

Tips & Tricks
Instead of selecting a portion of the image to fix, it is better to copy that portion that you selected to a new layer. You can always make the modifications on a new layer and then have the modified layer on top of the original image.
Mix and match the Auto Enhancements. Sometimes it only takes one Auto Enhancement where others will take all 3. You do not need to use all 3 Auto enhancements commands in Photoshop. Play around with the enhancements. Use CTRL-“Z” to undo.
Conclusion
By now you should know how to do the Auto Tone, Auto Contrast, and Auto Color. These tools do a great job if you need to do a “Quick Fix” on the Photos. The next few tutorials, we will be talking about manual adjustments (curves, levels, etc.) and you will find that if you use those tools that you will usually get a better result. Instead of good, your images will look great! We do the Auto Enhance options in Photoshop if we need to adjust a large amount of photos at once and then we go back through and find the images that can be improved on by manually enhancing the photo.

1). All of the auto enhancements are in what menu?
| | A). Select. |
| | B). Auto. |
| | C). Edit. |
| | D). Image. |
2). If you want to only fix a portion of the image, what should you do?
| | A). ALT Left Click the area. |
| | B). Left click the “Auto Selection” and then make your adjustments. |
| | C). Copy the whole complete image to a new file and make the adjustments. |
| | D). Make a selection around the area you want to fix. |
3). How many different Auto commands does it take to get the right enhancement.
| | A). Only all 3. |
| | B). Only 2 of them. |
| | C). 1-3. |
| | D). Only 1 of them. |
4). If the auto enhancement makes it look worse, what did we recommend that you do?
| | A). Use the “Undo Auto” command. |
| | B). Use CTRL-“Z”. |
| | C). Use the same auto enhancement option and it will revert back to the original. |
| | D). Re-open the document and then apply the enhancements. |
5). Name the 3 Autos?
| | A). Tone, Fix, Color. |
| | B). Contrast, Color, Enhance. |
| | C). Contrast, Tone, Color. |
| | D). Saturation, Color, Contrast. |
6). Which statement did we say is true?
| | A). Manual enhancement is usually better than the auto enhancement. |
| | B). Manual enhancement is usually as good as the auto enhancement. |
| | C). Auto Enhancement is faster and does a better than manual enhancement most of the time. |
| | D). Auto Enhancements actually take longer to enhance (there are 3 enhancements) then the manual enhancements. |
7). What is the correct order to use the Auto Enhancements?
| | A). Tone, Contrast, Color. |
| | B). Contrast, Tone, Color. |
| | C). Color, Contrast, Tone. |
| | D). No order is correct and you should play with each enhancement. |
8). Name 1 tip and trick that we recommended in this tutorial.
| | A). Only use auto enhancements when you have less than 10 pictures. |
| | B). Make a selection of the area you want to fix and copy it to a new layer and make the enhancements on that layer. |
| | C). Always work in the zoom mode (magnifying glass) when you are going to be adjusting a specific area. |
| | D). Always turn on the “Auto Correct” feature in the “Image” menu. |
9). When should you use the auto enhancement features in Photoshop?
| | A). To fix only underexposed images. |
| | B). To fix only overexposed images. |
| | C). Fix only the contrast. |
| | D). To make a quick fix to the photos. |
10). What is a way to run all 3 enhancements at once?
| | A). Use CTRL-ALT-“L”. |
| | B). Currently we have not shown you a way to combine steps. |
| | C). Use CTRL-ALT-“A”. |
| | D). In any of the Auto features, Left click the “Auto Append” option in the options bar. |
Answers: 1). D, 2). D, 3). C, 4). B, 5). C, 6). A, 7). D, 8). B, 9). D, 10). B
Scoring:
0 - 5 = Please review the video tutorial and re-read this document either offline (PDF) or online.
6 – 8 = We would recommend that you print this document off and read it at a later time.
9 – 10 = Congratulations you have passed the quiz. Go ahead and view another tutorial on our site.
We hope you enjoyed this detailed tutorial. Please visit us at: http://www.Photoshopeducation.blogspot.com to expand your knowledge within Adobe Photoshop.
Click Picture To Download Video File To View Offline
Download Total Video Player, iTinySoft
Click Picture To Download PDF Tutorial
Download Adobe Reader, Adobe Corporation
Click Picture To Download Supporting Files
(Brushes, Textures, Fonts, Images, Actions, .PSD, Etc.)
Download ZipGenius Standard Edition 6.0.3.1150, Dicono di ZipGenius


